Welcome to my first tutorial! If you’re looking for a fun sewing project that is also practical, you’ve come to the right place!
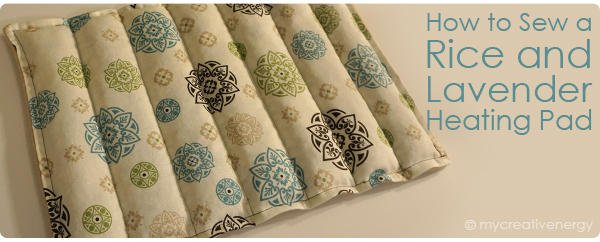
A rice and lavender heating pad is a really easy project for a beginner to intermediate sewer. It’s also a great project if you have some scrap pieces of fabric lying around that you’d finally like to use. And best of all: a handmade heating pad makes a great gift because it’s both thoughtful and useful.
First, a quick disclaimer: I am the ‘beginner-to-intermediate sewer’ that this tutorial is targeting. I’ve been sewing for about 2 & a half years now, and everything I know is self-taught (but not without the help of Youtube). I’ve made a variety of items over the years including: 4 runners, 4 baby quilts, a t-shirt quilt, potholders, a tote-bag, fitted covers for seat cushions, some pillows, a toybox lid cover, and 4 rice & lavender heating pads. Okay, so maybe I can shed ‘beginner’ from my label – but I’m certainly not an expert! Nevertheless, the best way to learn something is to explain it to someone else, so here we are :)
Let’s get started!
Supplies needed:
- 2 coordinating pieces of fabric (1 cotton, 1 fleece)
- Rice – about 2½ Cups
- Dried lavender (or other scent) – about 2½ Cups
- Your basic sewing essentials: Cutting mat, rotary cutter, tracing wheel, tape measure, pins, sewing ruler and of course – a sewing machine :)
Step 1 – Cut fabric
Cut both your cotton and fleece fabric to be 15″ x 11″. The final size of your heating pad will be 14½” by 10½”. This size you will give you 7 two-inch columns for your rice and lavender filling, as well as a clean ¼” seam all around the perimeter of the heating pad. I like to use cotton and fleece because it’s more interesting (and comforting) than all cotton, but easier to fill than all fleece.
Step 2 – Pin fabric, inside out
Place your fabrics on top of each other, with the RIGHT SIDES facing IN. I’m not sure if fleece has a ‘right side’…but my cotton fabric clearly did – so that was placed face down, on top of my fleece. Then place pins along 3 sides (the 2 short and one long), perpendicular to the edge. I placed my pins about an 1½” apart.

Step 3 – Sew 3 sides of fabric together, inside out
Starting with your long (15″) edge, sew your seam ¼” in from your edge. Then, sew a ¼” seam along the two 11″ sides, starting from the corner of the long edge that you already sewed.
*Super-important:* When sewing the vertical seams, stop sewing 1 inch from the end of the open long edge. You’ll be folding in those remaining edges, and an inch is the perfect amount of clearance (unlike the dumb 1/2 inch I left myself – pictured below).
 Left: leave an inch at the end of your vertical seams. Right: The seams meet at ¼” from the edge.
Step 4 – Reverse fabric & press
Well, that’s pretty self-explanatory…your heating pad should now measure 14½” x 10¾”.
Now is a good time for me to declare my love for my pressing cloth. I use a pressing cloth anytime I iron anything other than cotton. It’s a nice little insurance policy that I’m not burning/ruining my fabric.

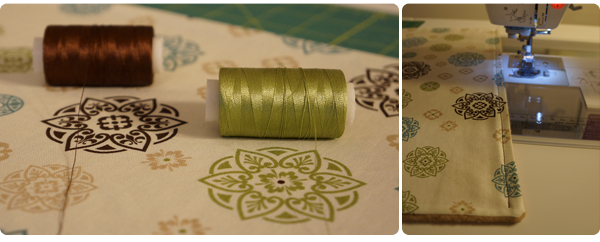
Step 5 – Sew ¼” perimeter seams along 3 sides, using contrasting thread
In my opinion, contrasting thread makes a world of difference. It’s a simple touch that can really tie a piece together. I chose to use 2 contrasting colors (brown and green) that coordinated with the colors of my patterned fabric.
Similar to step 3, I sewed my ¼” seam starting with my long edge (now 14½” long), and then sewed my shorter sides (now 10¾” long), starting from the corners of my long sewn edge. Once again – stop sewing 1 inch from the end of the open long edge (at about 9½ inches).
Step 6 – Sew 2″ columns for the rice/lavender filling
The total area between your 2 decorative seams should be 14 inches. To make 7 2-inch columns, you’ll want to sew 6 vertical lines, each 2″ apart. To do this, I made 3 small marks with a fabric pencil for each line. I then connected the marks using a tracing wheel. This was so I didn’t have to worry about erasing long marking lines. I then sewed along these lines (starting from my long sewn edge) with my other contrasting thread. The tracing wheel indents were a little tough to see – but I always enjoy a challenge :P Once again – stop sewing 1 inch from the end of the open long edge (at about 9½ inches).

Step 7 – Fill the columns with a mixture of rice and dried lavender!
I like to use a ratio of about 3:1 rice:lavender, mixed well. Then, I used a generous ¾ of a cup of the rice/lavender mixture to fill each column. Feel free to make adjustments to the type of filling you’d like to use. I actually used both dry lavender AND dry rose in the heating pad pictured, but using just rice and lavender is quicker. It’s important to pack the rice down so that you can have enough room to fold in and sew that final edge. After I fill a column, I fold the fabric and clip it with an alligator clip to keep it from spilling.

Step 8 – Pin to secure rice
Once your columns are filled, you’ll want to pin your columns closed so that you can remove the alligator clips. Place your pins parallel to the open edge of the fabric, just above the packed down rice, using about 2 pins per column. This should give you about 1½” – 2″ of flat fabric to work with.

Step 9 – Fold and sew final edge
Remember that inch of buffer space we’ve been leaving ourselves? It’s time to thank ourselves for doing that. Fold both open edges of both the cotton and fleece in towards each other, so that they match the 3 other sides. You’ll probably be able to fold a little less than a ½” inch in – but that should be plenty. Secure these folds by (once again) placing pins parallel to the edge (7 pins should be plenty). Then, use the same contrasting color you used for your previous perimeter seams, and sew these folds together, ¼” from the edge (removing pins as you go). You’ll likely need to quickly re-stitch the ends of your vertical seams to make sure they meet up with your final horizontal seam.

Step 10 – Toss in the microwave and enjoy!
I like to lay a paper towel down just to make sure nothing gets on my heating pad. 2-2½ minutes is usually a good amount of time – but I always check on it after 1 minute, just to see how it feels. This size heating pad is nice to lie on top of to soothe a sore back.
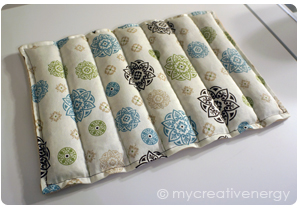
 Left: My rice, lavender & rose heating pad. Right: An Eagles-themed rice & lavender heating pad that I made for a friend.
Well, I hope someone finds this tutorial helpful or inspiring. If you do give this project a shot – please leave a comment letting me know how it went! Good luck!
If you like this post, check out some of my other sewing and craft posts: a sunglasses case, with embroidery, handmade Christmas gift tags, some more Christmas crafts, and lastly creating & embracing my own yardstick.

I’m impressed! This almost makes me want to sew a heating pad… even though I would never, ever use it!
Pingback: Christmas Craft Recap & Creative Optimism for 2013 | Amy's Sandblog
Thanks! I was looking online to buy one of these because the rice heating pad I had — and loved — was chewed up by my roommate’s dog. Found your instructions and now I’m going to make my own! Much cheaper and way more fun :)
Oh great! I’m so happy you found this! I hope you find my instructions easy to follow :) Good luck and enjoy!!
Thank you Amy! I am going to make pot holders for my daughter-in-laws, my mom and my mother-in-law for Christmas, great stocking stuffers!. I like the larger size. We do a lot of baking in our family and we are all crafty so it will be fun. I will let you know how they turn out. :)
Hi Deb! Sorry for the delayed reply! Good luck with the potholders. I know they sell special heat-resistant batting for potholders. I made a set for my Mom 2 years ago. The hardest parts were the rounded corners and the strip of fabric that goes around the border (the name escapes me right now) – but I guess you could really create the same edge as this heating pad and it would still look neat. Good luck! I’d love to see the results :)
Just the tutorial I was looking for, and very easy to follow your directions. Thank you!!
Oh good! I’m glad you found it and thought it was helpful :)
Pingback: FO: Heating pad with rice | stitchable
Holy moly! #mindblown
Not only did you make this (#soawesome)
But you then took detailed pictures and wrote a detailed (and funny) blog about it! #whatdontyoudo? #coolestpersonever
Hi, my roommate and I are planning to do a pad each and I am wondering which option is better: Getting dried lavender or using lavender scented essential oil? Do you know which will produce more scent and maintains longer?
Thanks to all beforehand :)
-Sara
Hi Sara :) I’m not sure I can say which is better, as I’ve only ever used dried lavender. But, the pad that I made for this tutorial (2 years ago), still smells like lavender. It’s not super strong (you have to get close to smell it) – but it’s strong up close. I’m not sure if oil would last longer or not. Good luck!
May I ask why use fleece? Just asking, because I have lots of flannel fabric from the rag quilt I didn’t make. What are your thoughts on flannel?
Hi Jessica! I used fleece because I had some left over from a different project and I thought something plush and fuzzy would be nice. It’s good because sometimes one side is a little hotter than the other, so you can choose which side you want against your body. I think flannel would work too, although, I’ve never tried it. Thanks for stopping by!
Fleece can retain the moisture…trapped moisture equals mold!
Wow!! Absolutely love this tutorial. Just finished making my first pair of rice bag heating pads. I had some dried lavender that I added to the rice. Hope my he-man boyfriend won’t mind when they’re on his sore knees!!
Thank you. I found that you had great step by step instructions.
Made one for my daughter for Christmas. I know she’s going to love it.
Very well explained. I’ve been making rice bags for years but have never done one with channels. I think I’ll do those for Christmas!
Great tutorial! I’m very new to sewing with the exception of a few pillows as a kid. Mine ended up with a few flaws but I love it.
I am planning on making one of these soon! Can you wash this or would that mess it up (like when you wash a regular pillow and the stuffing goes to one end)? Would it be a good idea to make a “pillowcase” for this as well so that you can just wash the pillowcase? Please reply ASAP! Thanks! :)
You could make the whole heat pad out of all cotton fabric like muslin and then make your “pillowcase” out of the pretty fabric! I have always read to use and have always used 100% cotton for anything (ie baked potato bags, tortilla warming bags, heat pads) that goes in microwave. Put some velcro on pillowcase if you’d like so it will stay closed or make it pillow sham style. 😊
Pingback: Protect Your Birthday Suit – Everyday Earth Chick
Pingback: Keep Utility Bills Low This Winter | Erin Mackey, Author
By far the easiest tutorial I found, perfect for a rusty sewer like myself. Thank you!
Thanks so much for this wonderful tutorial. I appreciate how you took so much time and effort to clearly help us all understand every step of the process, including your great quality photos to go with it. I am ready to pick out the fabrics and start making a few of these for a few family members and friends. What a great little surprise it will be!
If your ratio is 3:1 why do you say you need the same amount of lavender as rice?
Great tutorial!! Thank you for taking the time to put something like this together. I do not sew often and your tutorial helped me through every step of this project. Thank you!!
On your Super important note; you mention sewing the vertical seam, which is the vertical?
Pingback: Protect Your Birthday Suit | Everyday Earth Chick
Pingback: DIY & Crafts: DIY Heating Pads for Cold Winters and Painful Aches – Slideit.top
Thank you for taking the time to make an post this tutorial! I’m a beginner at sewing, but this looks like fun and I think I can manage it :)